

Save and reuse: Divi Library, Import & Export Elements and Selective Sync
Do you know this? Have you been working on your Divi website for some time, e.g. on a text? The text is written and you're still tweaking the formatting. Everything looks good. You're happy with your work. Great! But then you realize that this is not the only text you want to add in the near future. There is a new additional package to your offer. And you just think: Crap! Don't insert all the design elements again and format them from scratch.
Why isn't there a function that allows me to use everything I do on other subpages and not have to adapt it again and again? Copy and paste, so to speak.

Good news. Something like this actually exists. And it's not difficult to implement.
In this tutorial, we will show you how you can easily copy your own elements, be it modules, lines, sections or even entire pages, or save them as global elements only once and use them multiple times.
It deals with these topics:
- Divi Library: What is it and how do I use the Divi Library?
- Save global elements in your Divi library
- Selective Sync: what is it?
- Duplicate complete subpages in the Divi Builder
What is the Divi Library?
In order to be able to use all the desired functions from the introduction (copy and paste), today we will deal with the Divi Library.

The Divi library is a clever tool for saving modules, lines and sections for later use. This is not only helpful, but also saves a lot of time when creating subpages by being able to access the same content and insert it in a new location. In other words, "copy & paste" on a grand scale. We explain exactly how you can benefit from the Divi library here.
Use Divi library correctly
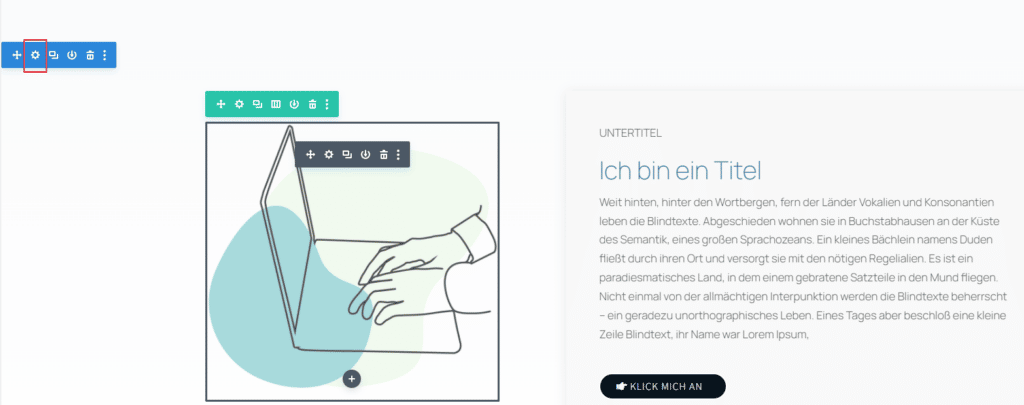
To show you how to use the Divi library correctly, it is important that you are on a subpage in the Divi Visual Builder. As an example, we have created a section with a two-column row containing an image, a text module and a pre-formatted button. The whole thing looks like this in the Divi Visual Builder:

And like this in the wireframe view (green icon bottom right):

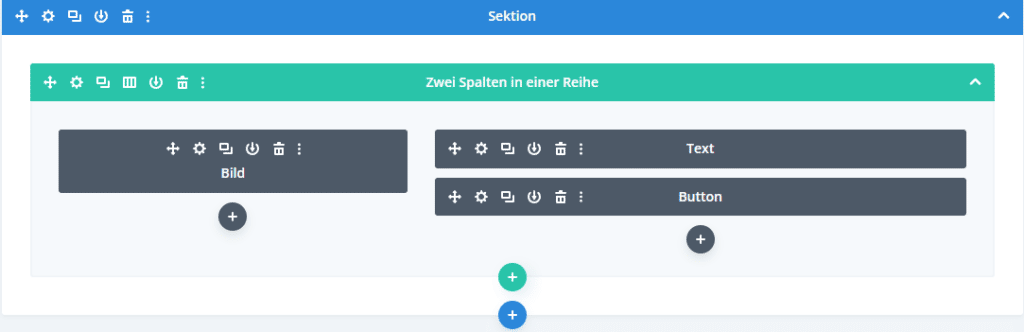
Pretty simple so far.
Note: This was all created and formatted for this tutorial. If you already have a website, then you can use the Divi library with any section, row or module you have created for your website. For those who still need to install and set up Divi first, we'll show you here how you can install the Divi Theme in just 3 steps. Here we explain how you can set up Divi for yourself.
The text continues happily.
Everything has been created and is now waiting to be used elsewhere. To delete an entire section (or a line or a single module) in the Save Divi librarywe go to the settings of the respective section by clicking on the cogwheel in the blue frame.
A new window opens. Here we click on the three vertical dots at the top right and a menu opens. You've already guessed it. Simply click on "Save to library".

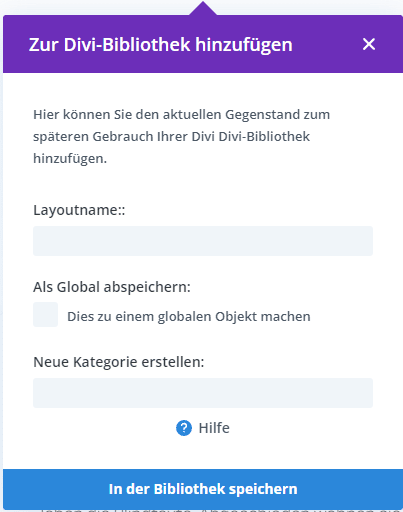
You can now assign a name for your section here. We call this section "Textbox_right" as an example. Simply because this is a right-aligned text box. If your website is very large and contains many different design elements, it is advisable to create a new category. Later you only need to search for the section in the correct category.
In our example, we call the category "General text boxes" as it is used in the general part of our website and not in the blog or store area. There are no limits to both the layout name and the category name.
A tip for the Divi library: Try to choose a name/category title that is easy to find later and describes the element relatively well. This will save you a lot of searching in your Divi library later on.
We will come to the meaning of the "Make this a global element" checkbox later in this article. One thing at a time.
To insert this text box in another place on your website, we recommend the following steps.
1 First, we go to the subpage on which the previously saved section with the name Textbox_right should appear and open the page in the Divi Visual Builder. We navigate to the desired location.
2. add a new section by clicking on the blue plus symbol. A new window opens. Click on the Divi Library" tab you get access to your previously saved section.


3. simply select and voilà the section has been successfully inserted from your Divi library.
Now you have learned how to simply copy an element and paste it elsewhere on your website.
If you would like to know which stored Divi library elements are included in WordPress, you can find them as a list in the Divi menu.
To do this, simply go out of the Visual Builder and navigate to the WordPress dashboard. In the right-hand menu under Divi, you will find a tab called "Divi Library".

Here you will now find all the library elements ever saved.

Note: You can also use your saved library elements in other WordPress installations or import them from elsewhere. To do this, select them in the list and click on the "Import & Export" button at the top left to import or export them. You will then receive a so-called json file for exporting, which you can import into another WordPress installation and vice versa.
So far, so good, but how can an element not only be copied, but also changed across all pages so that you don't have to adjust it five times later, for example, in five different places when making a small change to the font size? This is where the global elements come into play, which we will explain further in the next section. By the way, the list of your Divi library in the Divi menu also shows you the global elements.
Global elements in the Divi library
What are global elements? Let's take a closer look at the Divi manual. Divi describes global elements as follows: "A Global library element is a module, line or section that appears exactly the same on all pages where it is added."
You can add a single global module to multiple pages. If you change the global module on one page, it will also be updated immediately on all other pages to which it has been added. If a single module is repeated on multiple pages, it makes sense to make this module global. This way, you don't have to edit every single page every time you want to make a change to a global library element.
You can recognize global elements relatively easily by the green frame, in contrast to saved library elements. In the following image, for example, you can see the green frame on an element in the footer.

Here, the entire footer is a global element. You can now assign the label "global" to a library element. Simply add a fully formatted element of your choice as a library element to the Divi library and check the box "Make this a global element". That's all there is to it.

Now all elements linked to this global element are absolutely identical.
Be careful with changes! If you change a global element, all other elements linked to it will also change.
But how is it possible not to copy certain options, e.g. within a designed text module, across all linked global elements? In other words, you have a text module in which you have pre-formatted the font color, font size, background, etc.. You now create a global library element from this text module and insert it from the Divi library in several places on your website. But then you realize that you want everything to be identical, but not the content of your text. Everything should look the same, but the text should be individual.
Use selective sync for global elements
This is where Selective Sync comes into play. Selective Sync means "selective synchronization". Selective Sync allows you to uniformly multiply certain options within global elements. Where Selective Sync is not to be used, i.e. in our example within the text editor, the content remains individual and is not copied.
To do this, simply click on the synchronization icon until it appears in red. Red means that settings are not duplicated across all linked elements. In the following short video you can see where the icon to click on is located in a global element.
This is what the synchronization icon looks like:

In other words, when you edit a global module, you can easily see which options are currently being synchronized by the green synchronization icon to the left of each option.
Options with the green synchronization symbol are options that are currently being synchronized within the global module. Options edited with green synchronization symbols are shared by all instances of the global element.
To unsynchronize an option, simply click on the green synchronization icon as described above and the icon will turn red. Options with the red synchronization symbol are NOT copied.
Now you've seen how easy it is to cleverly mirror elements on different subpages using global elements from your Divi library. But Divi can do even more.
Duplicate complete subpages in Divi
You can do it. And it's not even that difficult. Divi offers an import/export function for entire subpages. This allows you to duplicate Divi subpages not only within a website (as with the Divi library), but also in another WordPress website where the Divi theme is installed. Everything, including images, custom CSS and advanced theme settings, is combined in a single json file. We explain how this works here.
Exporting individual subpages
To duplicate or, more precisely, export individual subpages in Divi, navigate down to the desired subpage within the Divi Visual Builder until you see the icon with the two arrows.

Clicking on it opens a new window with the title "Portability" with two tabs. We are initially interested in the first tab "Export". Here you can enter a name for the subpage you want to copy. The subpage will be made available to you as a json file when you click on the button below. Download the file to your computer. Done. You have now created a copy of your subpage.
To bring this copy back to life elsewhere, simply create a new page in WordPress via WordPress Dashboard - "Pages" - "Create" and open it with the Divi Visual Builder (here: "Use the Divi Builder").

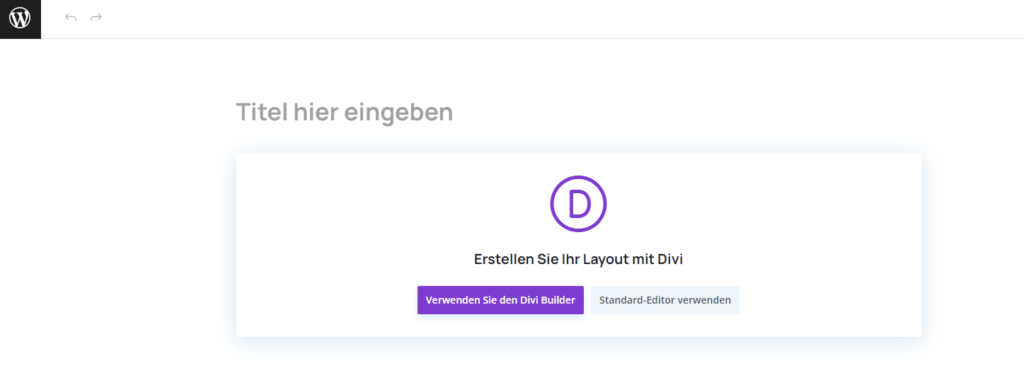
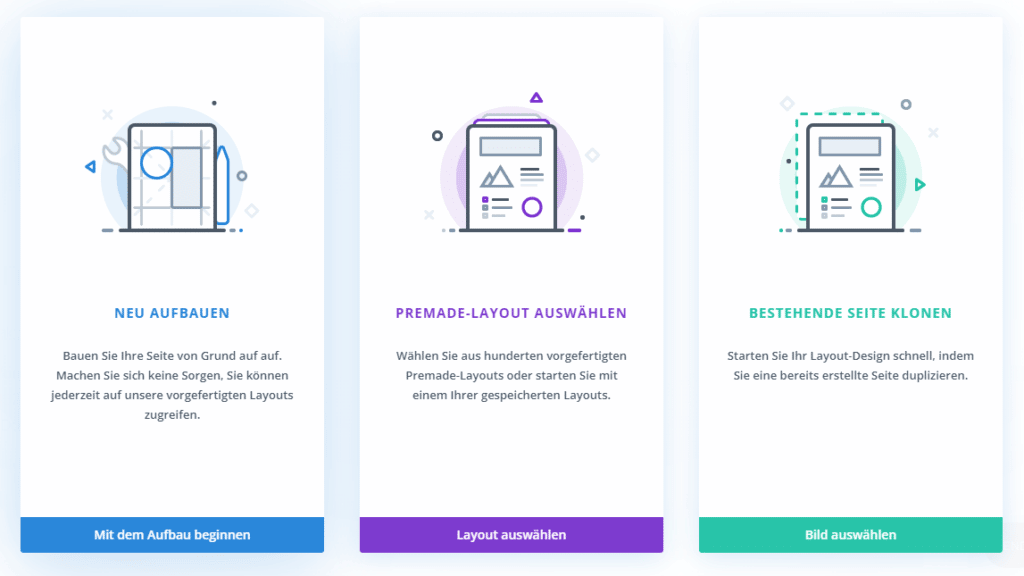
A new window will open. You now have the option of setting up a new page from scratch or, if subpages already exist, you can simply clone them. For our example, we will click on "Rebuild".
A new page opens and the first thing that appears is a window with the title "Insert row". We can safely close this, as we are importing your saved subpage in json format and do not want to insert a new row in our example. Navigate down, click on the icon with the three dots and then on the familiar icon with the two arrows.


Yes, we've already seen that. Exactly. You get back to the "Portability" window. Only this time, click on the "Import" tab and upload your previously saved json file. Since this page is empty, you can safely check the "Replace existing content" box. If you do not check the box, Divi will copy the new subpage into an existing layout without deleting it, if one exists.
In our example, this does not matter as we are working on a blank page. If you want to copy your layout to an existing subpage, we recommend that you do not check the "Replace existing content" box and download a backup before importing ("Download backup before import").
A small note on the presets
If you have already worked with presets, you can also import them here with "Import presets", but be careful, these presets overwrite existing presets. So only check this box if you know for sure that importing presets will not have a major impact on other subpages. Presets are a separate topic and would go beyond the scope of this tutorial. However, if you would like to find out more, you can find further information in English on the Website of Elegant Themes.
Conclusion on the Divi library
With the help of the Divi library, the export & import of design elements and Selective Sync, you can not only save time but also a lot of effort when creating and designing your WordPress website. True to the motto "Work Smart not Hard", we recommend that you use the functions described in the tutorial in the future.
Would you like to try Divi for free? Then register here for our free hosting including pre-installed Divi Theme!
We hope this tutorial has helped you? Let us know in the comments how you use the Divi library tips for yourself. Or would you like to add something else? Just let us know.